
FDM
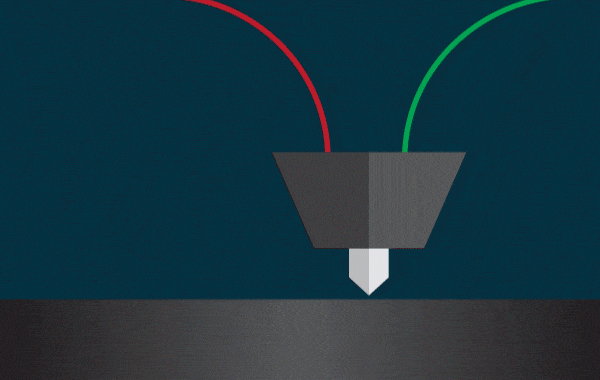
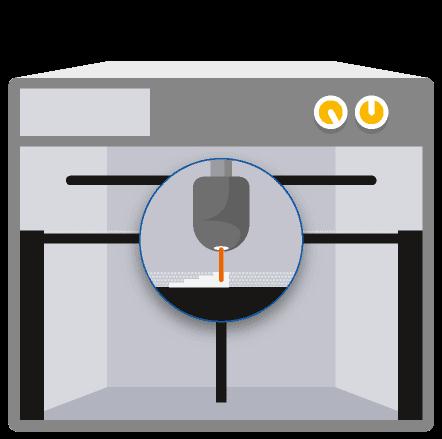
Fused Deposition Modeling – FDM – uses a continuous bead of thermoplastic filament, laid down on a mobile z-stage to build up a 3D part layer by layer. It is ideally-suited to rapid prototyping and the production of parts for which long-term stability and durability are key requirements. FDM technology is one of the longest-used 3D printing processes. In common with other rapid production systems, FDM systems read data from STL files, which they convert into reference points for reproducing the original design within the printer’s build envelope. The printer heats a continuous thread of thermoplastic filament, of which a fine bead is extruded through a heated tip and laid down on the print bed. When the first layer is complete, the bed steps down and the process repeats.
The Benefits
- FDM parts are strong and dimensionally stable, so maintain their accuracy and material properties over time.
- Parts can be built using ISO materials when used for medical applications and for contact with food.
- The rigid material used in the Fused Deposition Modeling process means parts can be built with few supporting structures to minimize costs.
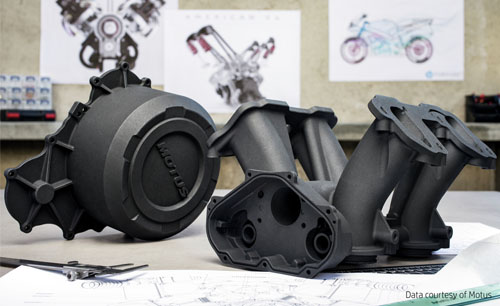
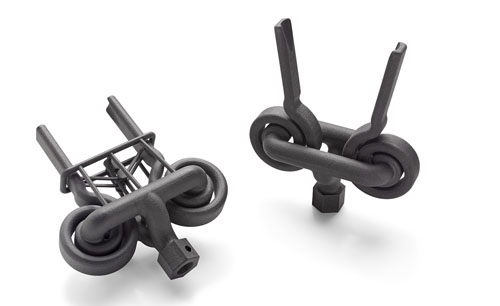
DIRECT METAL LASER SINTERING
Unlike with most home printers, DMLS printers do not use filament. In fact, the 3D printed parts are constructed from very fine, granular Aluminum or Titanium powder. It is important to note that the powder used by 3D printers cannot be any kind of powder. Since it will be used for ultra-thin printing layers, the powder must be perfectly shaped in order to even out. Consider rocks and marbles; you could easily put rocks on top of each other to build a pyramid. However, building a pyramid with marbles would be way more difficult, as the perfectly shaped spheres would just even out and your pyramid wouldn’t stand a chance. Similar to the marbles, the Aluminum and Titanium powder needs to have the perfect shapes of spheres since each and every printing layer needs to have exactly the same height
To create your 3D print, a laser in the printer melts the powder together. So here’s how it works:
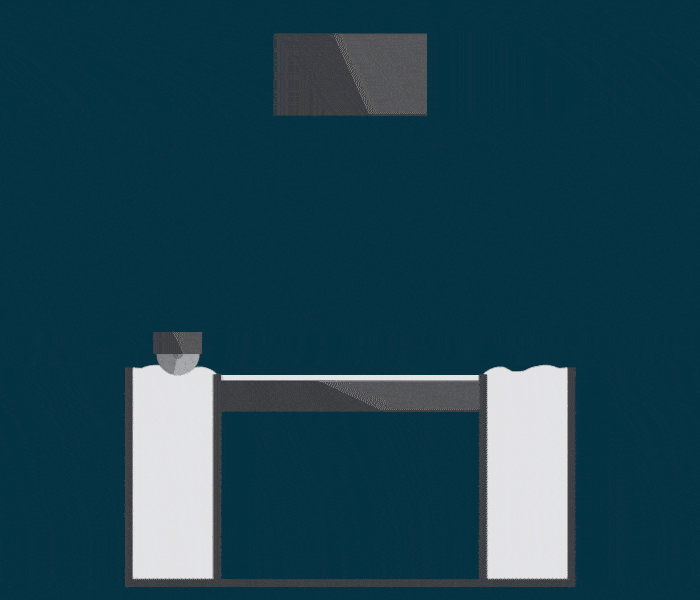
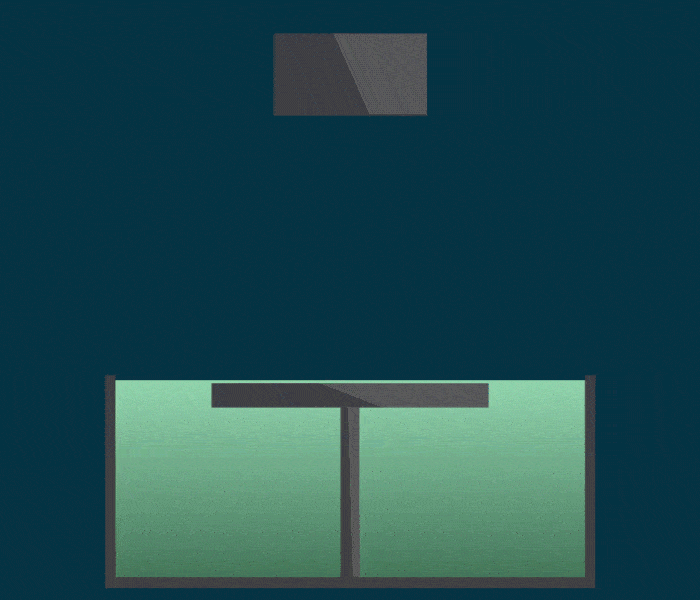
A super-thin layer of Aluminum or Titanium powder is spread out by a roller. The print chamber of the 3D printer is then heated up. However, the powder does not melt yet since it has not reached its melting point. And now the magic happens, a laser touches those areas of the layer that are part of your design, raising the temperature of those areas just above the melting point, and voilà, the part is sintered (well, one layer of your part). The 3D printer will continue to spread out one layer of powder after another, and the laser will systematically touch the correct spots of each layer and sinter the object together.</p.
SLA
Stereolithography (SLA) is an additive manufacturing process that belongs to the Vat Photopolymerization family. In SLA, an object is created by selectively curing a polymer resin layer-by-layer using an ultraviolet (UV) laser beam. The materials used in SLA are photosensitive thermoset polymers that come in a liquid form. SLA is famous for being the first 3D printing technology: its inventor patented the technology back in 1986. If parts of very high accuracy or smooth surface finish are needed, SLA is the most cost-effective 3D printing technology available. Best results are achieved when the designer takes advantage of the benefits and limitations of the manufacturing process. SLA has many common characteristics with Direct Light Processing (DLP), another Vat Photopolymerization 3D printing technology. For simplicity, the two technologies can be treated as equals.
How does SLA work?
Here is how the SLA fabrication process works:
- The build platform is first positioned in the tank of liquid photopolymer, at a distance of one layer height for the surface of the liquid.
- Then a UV laser creates the next layer by selectively curing and solidifying the photopolymer resin. The laser beam is focused in the predetermined path using a set of mirrors, called galvos. The whole cross sectional area of the model is scanned, so the produced part is fully solid.
- When a layer is finished, the platform moves at a safe distance and the sweeper blade re-coats the surface. The process then repeats until the part is complete.
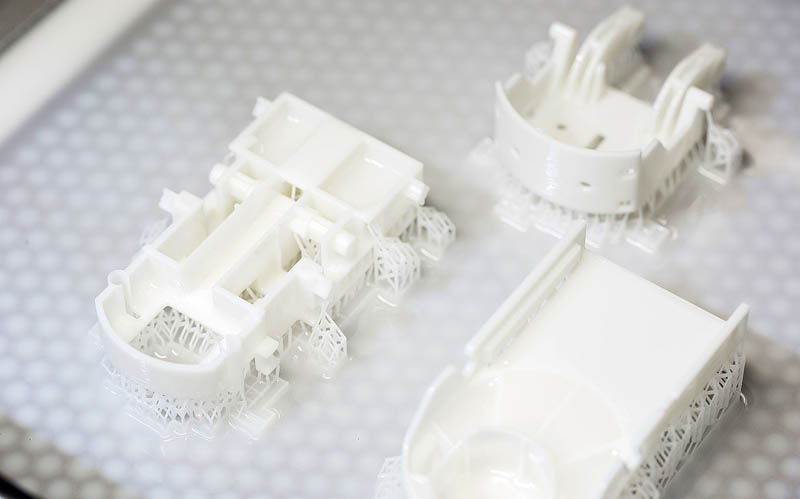

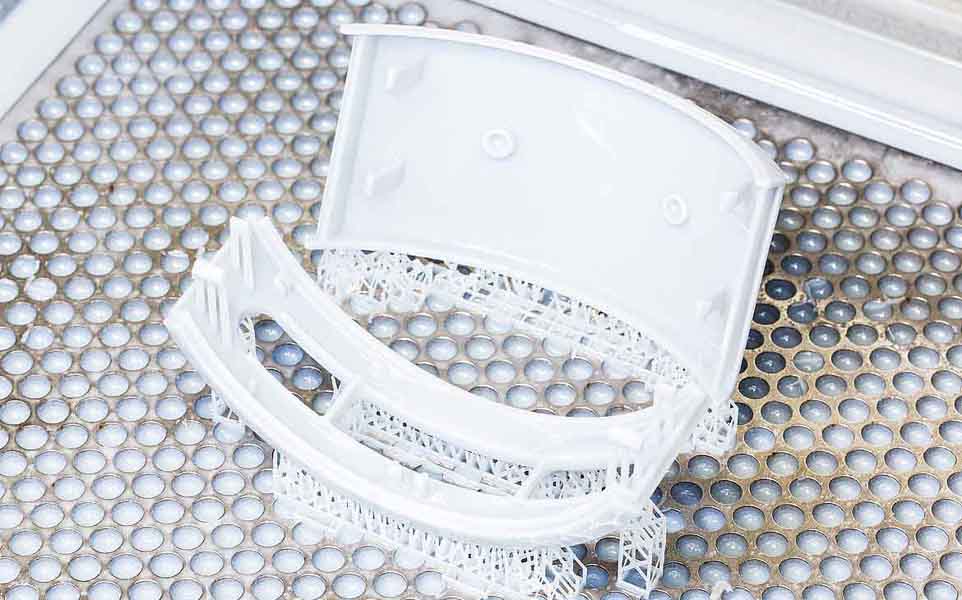
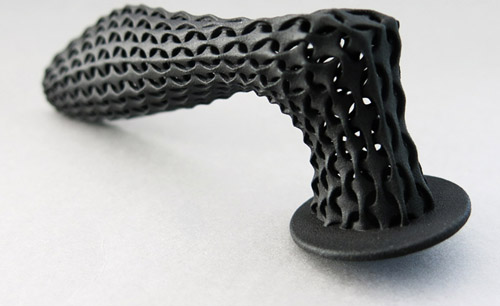
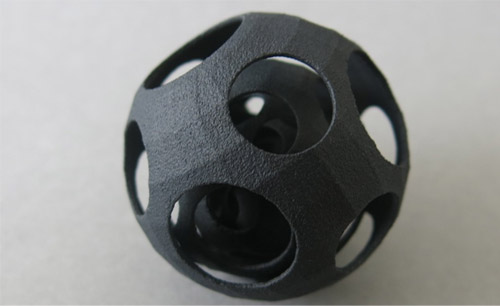
SLS 3D Printing
The Selective Laser Sintering (SLS) process uses a powdered polymer build material, typically nylon. A highpower laser then selectively scans the thin layer of powder, sintering together powder particles in the shape of the cross-section of the first layer of the 3D part. The build platform then descends one layer depth and the recoater transfers more fresh powder from the hopper to the surface of the first layer. Just like the first layer, the second cross-section of the 3D model is scanned and sintered. The laser scanning process simultaneously generates the current layer and adjoins it to the previous layer, making a solid part.
Compared to other additive manufacturing processes such as stereolithography (SLA) and Fused Deposition Modeling (FDM) or Fused Filament Fabrication (FFF), One of the key advantages of SLS process is that the powder bed serves as an in-process support structure for overhangs and undercuts, and therefore complex shapes that could not be manufactured in any other way are possible with this process. With no need for support structures, this technology is suitable for interlocking parts, moving parts, living hinges and other highly complex designs and gives infinite design freedom.

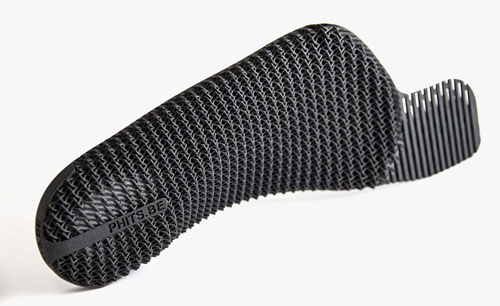
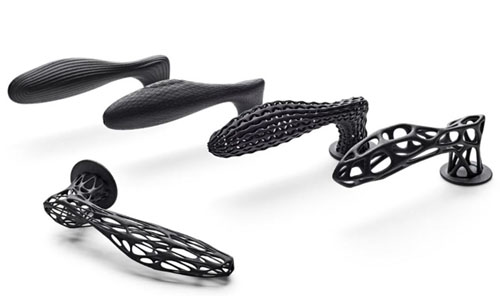
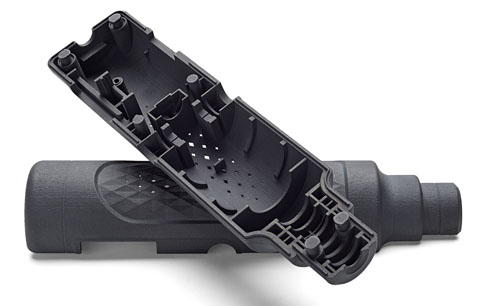
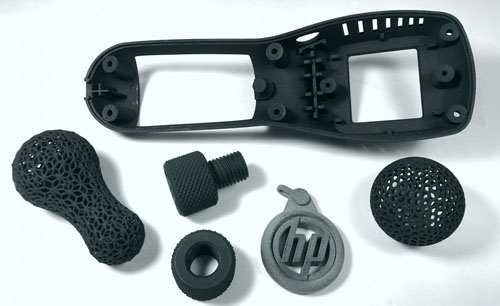
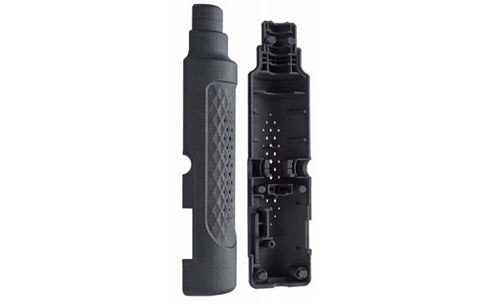


Ideal applications for Selective Laser Sintering
The applications for this 3D printing process are designs with moving parts, prototypes, consumer products, architectural models, hardware, electronics housing, medical devices , sculptures,jigs and fixtures, promotional items and more.
- The 3D model
- A laser binds powder particles together
- Successive powder layers are spread on top of each other, while a laser selectively binds particles to form the part
- The loose powder is removed
- The part is finished

1
2

3

4